Save
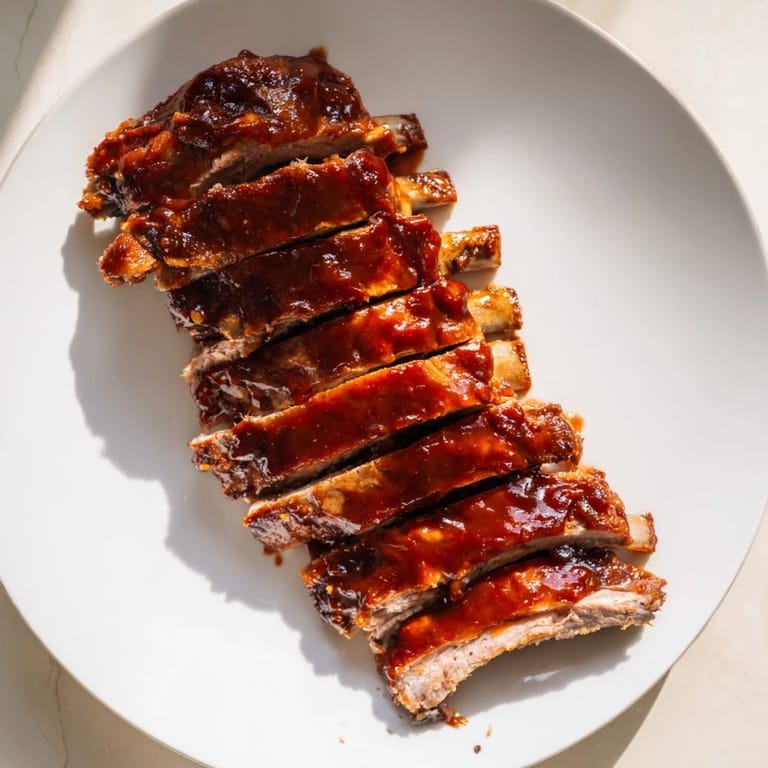
Save My dad taught me that good barbecue ribs aren't about rushing—they're about patience and the smell that fills your kitchen. One summer afternoon, I watched him pull a rack out of the oven, the meat already falling from the bones before he even touched it, and I realized that slow cooking wasn't just technique; it was respect for the ingredient. Now whenever I make ribs, I remember his rule: low and slow, always. That afternoon changed how I cook.
I made these for my sister's birthday last spring, and she brought them up at Thanksgiving six months later. That's when I knew the recipe had stuck—not because it was fancy, but because it tasted like someone cared enough to spend the afternoon with the oven door closed, listening to the low hum of heat doing its work. Her kids still ask when I'm making ribs again.
Ingredients
- Pork or beef ribs (1.5–2 kg / 3–4 lbs): The choice depends on your mood—pork ribs are gentler and sweeter, while beef ribs bring a deeper, meatier presence to the table.
- Olive oil (2 tbsp): This helps the dry rub cling to every surface and keeps the exterior from drying out during the long cook.
- Brown sugar (2 tbsp): It dissolves into the rub and eventually caramelizes on the outside, creating those beautiful dark edges.
- Smoked paprika (1 tbsp): This is where the soul of the recipe lives—use good quality if you can, it makes a real difference.
- Garlic powder (1 tsp): A workhorse ingredient that builds depth without overpowering anything else.
- Onion powder (1 tsp): Adds a subtle sweetness that balances the smoke and spice beautifully.
- Ground black pepper (1 tsp): Don't skip this—it provides bite and keeps the rub from feeling one-dimensional.
- Salt (1 tsp): Your seasoning anchor; taste as you go because not all salt measures the same.
- Cayenne pepper (½ tsp, optional): A gentle heat that creeps in at the end if you want a little spark.
- Barbecue sauce (1 cup): Store-bought is fine and honest—don't pretend you need to make everything from scratch when the oven is doing the real work.
- Honey (2 tbsp): Softens the sauce's edges and gives the final glaze a subtle shine and sticky grip.
- Apple cider vinegar (1 tbsp): Cuts through the richness just enough so the sauce doesn't feel one-note or heavy.
Tired of Takeout? 🥡
Get 10 meals you can make faster than delivery arrives. Seriously.
One email. No spam. Unsubscribe anytime.
Instructions
- Set your oven and prep the space:
- Preheat to 150°C (300°F) and line your baking sheet with aluminum foil—this makes cleanup almost bearable and helps the heat distribute evenly.
- Remove the membrane and dry the ribs:
- Flip the ribs and peel away that thin, papery layer on the back; your teeth will thank you later. Pat them dry with paper towels because moisture is the enemy of good browning.
- Oil and coat with the rub:
- Rub olive oil all over like you're giving the ribs a gentle massage, then mix your dry ingredients in a small bowl and coat every inch, getting into the crevices where the bones separate from the meat.
- Wrap and begin the slow cook:
- Lay the ribs meat-side up on the foil-lined sheet and cover tightly—you want steam to work alongside the low heat, breaking down the connective tissue without drying anything out.
- Bake low and slow:
- Let them go for 2 to 2½ hours; resist the urge to peek too often because every time you open that door, you're letting heat escape and adding time to the clock.
- Prepare the glaze while they rest:
- Whisk barbecue sauce, honey, and apple cider vinegar together in a small bowl—taste it and adjust if it feels too sweet or too sharp.
- Crank up the heat for the caramelize:
- Remove the foil, increase the oven to 220°C (425°F), brush the ribs generously with your glaze, and return them uncovered for 10–15 minutes, basting once halfway through until everything looks dark and sticky.
- Rest and serve:
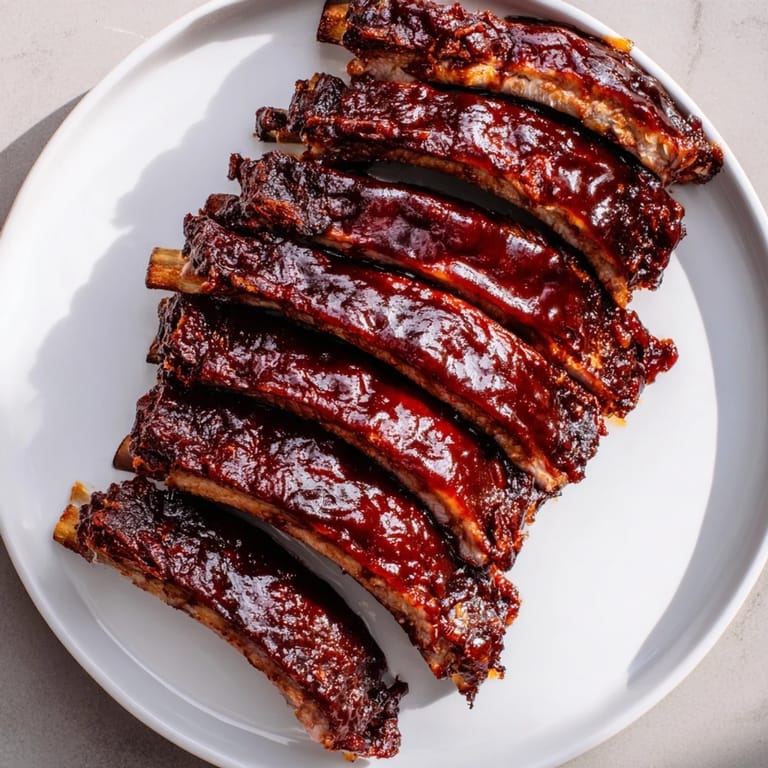
- Let them sit for just 5 minutes—I know it's hard—then slice between the bones and bring them to the table with extra sauce on the side for people to add their own.
 Save
Save There's a moment right around the 90-minute mark when you walk into the kitchen and the smell hits you so hard that you stop whatever you're doing and just stand there, breathing. That's when you know the ribs are doing what they're supposed to do. It's a moment of quiet pride before the chaos of actually eating them.
When to Choose Pork vs. Beef
Pork ribs tend to finish faster and stay a little more tender because they have less dense muscle fiber, while beef ribs—especially short ribs—need that full 2½ hours and reward you with a deeper, more savory bite. I lean toward pork for weeknight dinners and beef when I'm feeding a crowd who appreciates meat that makes a statement. Either way, you'll know they're done when the meat pulls back from the bone about a quarter inch and resists a fork with just gentle pressure.
The Dry Rub Formula
What makes this rub work isn't any single ingredient—it's the balance between sweet brown sugar, smoky paprika, and the umami punch from garlic and onion powder. I've experimented with adding coffee powder or mustard powder, and both work, but they can shift the whole flavor profile if you go heavy-handed. The beauty is that you can adjust the heat level with the cayenne depending on your crowd; I often make two batches and dust one side heavier for people who like spice.
Sauce and Finishing Touches
The sauce mixture is deliberately simple because the ribs have already done the heavy lifting of flavor development in the oven. The honey adds a glossy finish and subtle sweetness, while the apple cider vinegar prevents it from tasting cloying or one-dimensional. I've learned that brushing the sauce on twice—once at the start of the high-heat finish and once halfway through—gives you layers of caramelization that taste like you spent all day on this.
- If you have access to a grill, moving the ribs there for the final stage adds real smoke and a charred edge that the oven can't quite replicate.
- Leftovers shred beautifully for pulled rib sandwiches the next day if you store them properly in an airtight container.
- Coleslaw or cornbread on the side isn't just tradition—they provide texture and acidity that balance the richness of the meat.
 Save
Save There's something about sitting down to ribs that makes time slow down and people remember why they showed up. This recipe is an invitation to do just that—to take the afternoon, fill the kitchen with smoke and sweetness, and feed the people you care about something that tastes like patience.
Recipe FAQ
- → How do I remove the membrane from ribs?
Slide a knife under the thin membrane on the back of the ribs and gently pull it off for better seasoning absorption and tenderness.
- → Can I use pork and beef ribs interchangeably?
Yes, both pork and beef ribs work well with this method; adjust cooking time slightly if needed for thickness.
- → What is the best way to get a smoky flavor?
Grilling the ribs over indirect heat after baking enhances the smoky flavor and caramelizes the glaze beautifully.
- → How long should I slow-cook the ribs?
Cook ribs at 150°C (300°F) for 2 to 2½ hours until tender and meat pulls away from the bones easily.
- → Can I substitute ingredients in the glaze?
You can replace honey with maple syrup for a different sweetness or use gluten-free barbecue sauce if needed.